Admin Configuration Guide
A step-by-step guide for configuring your Vehicle Lookup System based on the actual admin panel features.
Overview
This guide walks you through configuring your Vehicle Lookup System using the actual admin panel features available. The system is designed for tenant admins to manage their vehicle lookup service efficiently.
Available Admin Features
- Settings: Company information, email configuration, and notifications
- Services: Manage remapping services and pricing
- Vehicle List: Control which vehicle makes are available in your lookup
- Edit Gains: Add custom performance data for specific vehicles
- API Integration: Configure colors, styles, and get integration tools
Configuration Order
Phase 1: Foundation (Required)
- Settings — Company information and email configuration
- Services — Configure your remapping services
Phase 2: Content Management (Essential)
- Vehicle List — Enable/disable vehicle makes for your lookup
- Edit Gains — Add custom performance data
Phase 3: Integration (Advanced)
- API Integration — Configure branding and get integration tools
Step 1: Settings
Purpose: Configure your company information, email settings, and notification preferences.
Location: Admin Panel → Settings
Configuration Steps
1.1 Email Settings Tab
- Quote Notification Email: Address where new quote requests are sent
- Quote Reply Email: Reply-to address in customer emails
- Send Quote Copies: Receive copies of quotes sent to customers
- SMTP Host: Your email server (e.g., smtp.gmail.com)
- SMTP Port: Usually 587 (TLS) or 465 (SSL)
- SMTP Username: Your email address
- SMTP Password: Email password or app password
- SMTP Encryption: TLS, SSL, or None
1.2 General Settings Tab
- Company Name: Appears in quotes and emails
- Phone Number: Customer service number
- Website URL: Your business site
- Address: Appears in quotes
1.3 Notifications Tab
- Enable Email Notifications
- Enable SMS Notifications (if configured)
- Send Quote Reminders
- Send Daily Summary
Validation Checklist
- Email settings tested and working
- Company information accurate
- Quote expiry period appropriate
- Notification preferences set
Important Notes
- Use the “Test Email” button to verify SMTP
- Company info appears in all customer-facing content
Step 2: Services
Purpose: Configure the remapping services you offer, including pricing.
Location: Admin Panel → Services
Configuration Steps
2.1 Adding Services
- Service Name: e.g., “DPF Cleaning”
- Price: Optional, in your selected currency
- Sort Order: Assigned by creation order
2.2 Service Management
- View All Services — table of configured services
- Edit Service — modify name and price
- Delete Service — remove unused services
- Bulk Actions — not available in current version
2.3 Service Categories (Examples)
- Stage 1 Remapping — basic ECU tuning
- Stage 2 Remapping — ECU + hardware modifications
- Custom Mapping — bespoke tuning
- DPF Removal
- EGR Delete
- AdBlue Delete
Validation Checklist
- Clear, descriptive names
- Accurate pricing
- Reflects actual services offered
- No duplicates
- Logical ordering
Important Notes
- Services appear in quote forms and API responses
- Prices optional (useful for custom quotes)
- Demo mode disables create/edit/delete
- Services are tenant-specific
Step 3: Vehicle List
Purpose: Control which vehicle makes are available in your vehicle lookup API.
Location: Admin Panel → Vehicle List
Configuration Steps
3.1 Initial Setup
- Create Settings Table — first-time setup creates
tenant_make_settings
- Auto-populate — all makes enabled by default
- Statistics — total vehicles, available makes, enabled/disabled counts
3.2 Make Management
- Toggle individual makes
- Bulk actions — enable all or disable all
- Make cards show: name, vehicle count, status, toggle
3.3 Make Control
- Enabled Makes: shown in the API
- Disabled Makes: hidden from the API
- Default: all enabled
- Tenant-specific: each tenant manages their own
Important Notes
- Disabled makes won’t appear in lookup results
- Impacts all API integrations (WP plugin, manual)
- Changes take effect immediately
- Demo mode disables make management
Step 4: Edit Gains (Overrides)
Purpose: Add custom performance data for specific vehicles that override standard database values.
Location: Admin Panel → Edit Gains
Configuration Steps
4.1 Adding New Overrides
- Vehicle selection — make, model, generation, engine
- Performance data — original/tuned BHP and torque
- Auto-calculation — differences calculated automatically
4.2 Override Management
- View overrides — cards with vehicle details
- Edit override — update values via modal
- Delete override — remove custom data
4.3 Override Cards Display
- Vehicle details: make, model, generation, engine
- Performance data: original vs tuned BHP/torque
- Differences: calculated gains
- Actions: edit/delete
Validation Checklist
- Accurate, realistic data
- Correct vehicle selection
- Plausible gains
- No conflicts with base data
- Regular review for accuracy
Important Notes
- Overrides take precedence over standard values
- Base on actual testing where possible
- Tenant-specific; demo mode disables CRUD
Step 5: API Integration
Purpose: Configure branding, colors, and download integration tools for your website.
Location: Admin Panel → API Integration
Configuration Steps
5.1 Color Customization
- Title Bar Color
- Title Bar Text Color
- Text Color
- Live Preview and Save
5.2 Gauge Style Selection
- Modern Cards (default)
- Circular Gauges
- Dashboard Style
- Minimal Bars
- Performance Arcs
- Comparison Bars
- Grid Comparison
- Neon Futuristic
- Digital Dashboard
- Digital Dashboard Rows
5.3 Integration Tools
- API Key
- WordPress Plugin download
- Manual integration code snippets
- API documentation
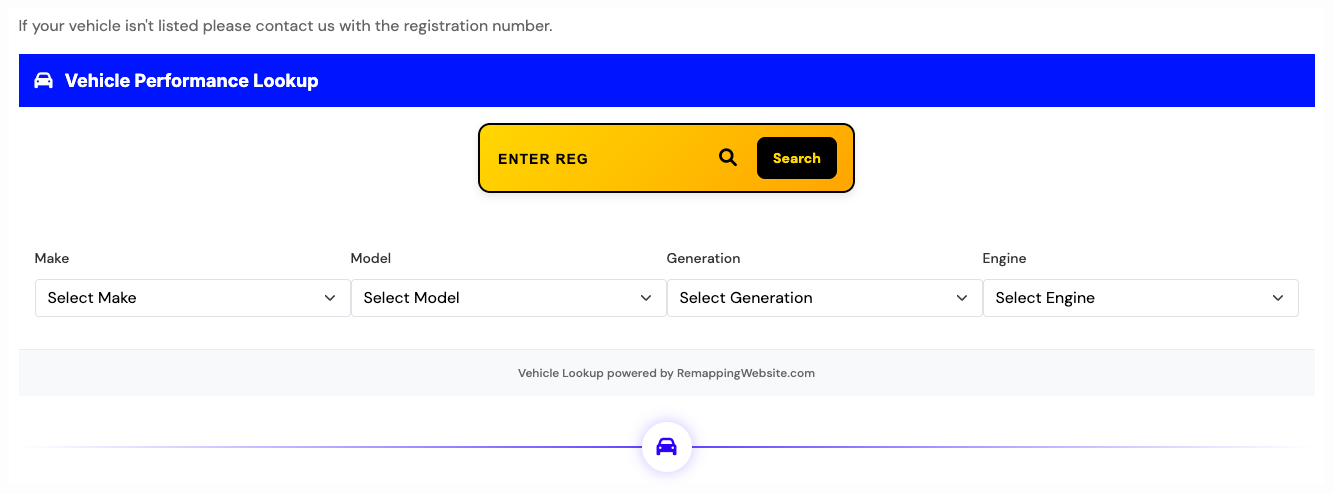
5.4 Live Testing
- Test Interface — built-in lookup
- Color/Style testing with real data
- Mobile testing
Validation Checklist
- Colors match brand guidelines
- Gauge style appropriate
- Preview looks professional
- API key generated and secure
- Integration tools downloaded
- Test interface works
Important Notes
- Changes apply to all integrations and take effect immediately
- Test across devices/browsers
- Keep API key private
Troubleshooting
Settings Issues
- Email Not Sending — verify SMTP and use Test Email
- Database Errors — contact administrator
Services Issues
- Services Not Appearing — ensure saved correctly
- Pricing Issues — verify currency settings
Overrides Issues
- Data Not Appearing — ensure override saved
API Integration Issues
- Colors Not Applying — click Save
- API Key Issues — regenerate and update usage
- Integration Not Working — verify key and code
Quick Reference
Configuration Checklist
- Step 1: Settings configured (email, company info, notifications)
- Step 2: Services added (remapping services and pricing)
- Step 3: Vehicle List managed (enable/disable makes)
- Step 4: Edit Gains configured (custom performance data)
- Step 5: API Integration set up (colors, styles, tools)
Key Locations
- Settings — Admin Panel → Settings
- Services — Admin Panel → Services
- Vehicle List — Admin Panel → Vehicle List
- Edit Gains — Admin Panel → Edit Gains
- API Integration — Admin Panel → API Integration
Important Features
- Email Testing — Settings → Email Settings
- Bulk Actions — Vehicle List (enable/disable all)
- Live Preview — API Integration (color/style)
- Modal Editing — Edit Gains
Best Practices
Configuration Management
- Start with Settings, then Services
- Manage Vehicle List, then add overrides
- Apply brand colors/styles last
- Document changes and review regularly
Data Management
- Keep company info/services current
- Use realistic, tested override data
- Test changes via live preview
User Experience
- Professional branding and clear service names
- Enable only relevant vehicle makes
- Test on mobile devices
Built by Remapping Website — Specialist Web Design & Portals for the Tuning Industry. More info:
remappingwebsite.com